R8 Finishing techniques
Initial skills rating **
September 2011
Although I have quite a good knowledge of finishes from my years of DIY and working as a technician in a school I am reluctant to rate my skills higher because I do not know what gaps I have in my knowledge.
Although I have quite a good knowledge of finishes from my years of DIY and working as a technician in a school I am reluctant to rate my skills higher because I do not know what gaps I have in my knowledge.
February 2012
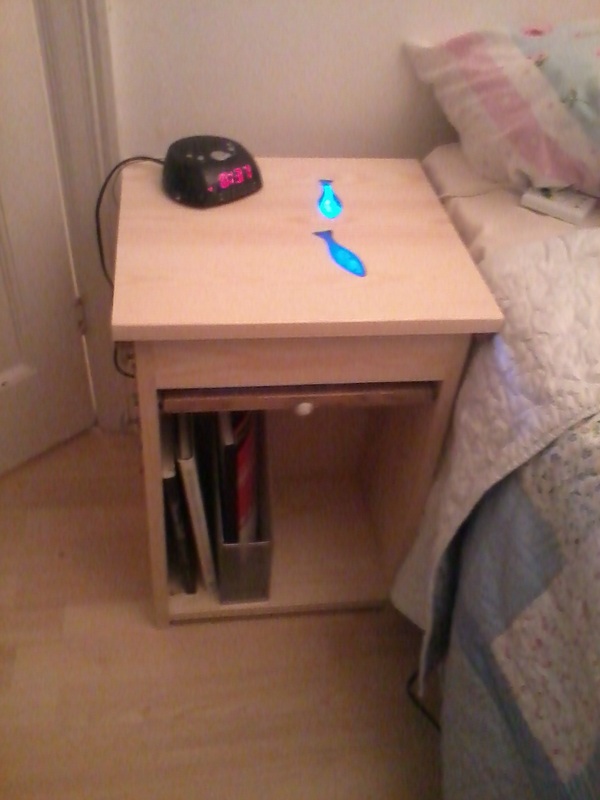
Bedside Cabinet
When it came to a finish for my bedside cabinet I applied my existing knowledge about products suitable for wood for sealing wood. To help with me decide the most appropriate finish I had to think about what I wanted my product to look like, where it was going to be use and what time I had for applying a finish.
Initially I fancied using a thin wash of white stain as this would have suited the room it was intended for but when I settled on twenty four tiny mortice and tenon joints to assemble the cabinet I decided I wanted all that decoration and hard work to be visible. So I wanted to select a finish that would allow the wood to show but still be moisture resilient against any spillages I might have with my bedtime water. It needed to suitable for an internal environment. My options were:
French polish - A skilled and time consuming finish used on fine wood - Time was not on my side and my wood was the cheapest wood available.
Danish Oil - Quick and easy to apply with a cloth and buffed when dry leaving. Danish oil brings out a slight richness to the finish. Coloured Danish oils are available. Linseed oil gives a similar finish.
Varnish - Apply with a brush - Surfaces must not touch whilst drying. I found when making toys for my children, no matter how long you leave varnish when two pieces are touching they always stick. I am not sure why. Acrylic water based varnish has a low odour, does not cause colour change and dries quickly. Household varnish is slower drying and causes the wood to yellow.
Wax - Wax comes in natural and coloured varieties such as teak and oak. It is quick to apply with a cloth and can be polished after the wax has had a chance to soak into the surface. Furniture will benefit from at least two coats of wax. The bedside cabinet will benefit from further coats of varnish especially as it will dry out in a household environment. Waxing wood helps protect the surface and feed the wood.
I chose wax as it is the easiest process to repeat as part of a household routine. It would protect the wood and the colour of my cabinet will stay natural. It would be quick and easy to apply and is a finish suitable for interior furniture. This may be a good place to mention that over time all wood deepens in colour.
Before applying the finish I looked in A. Jackson. D. Day: Complete Wood Woodworker's Manual to see if there were any other wood finishes I could consider. This book has a good section on finishes with details on how to repair small areas of damage as well at the treatment of knots.
Before applying the wax I used a medium grade aluminium oxide paper followed by a smooth aluminium oxide paper. By rubbing the papers in the direction of the grain a small amount of wood is removed leaving a clean, smooth surface. Aluminium oxide comes in a variety of grades. the number on the back of the sheet refers to the number of abrasive particles per square inch. The larger the number the more particles of aluminium oxide per square inch, the finer the paper and the lower the number the coarser the paper. this is true of all polishing papers and cloths.
July 2012
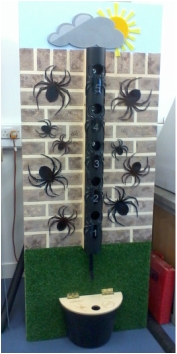
Activity Board.
This project was a little more challenging when it came to the finishing because I was working with materials that were new to me and because maintaining the texture was very important. I wanted to achieve the look of bricks.
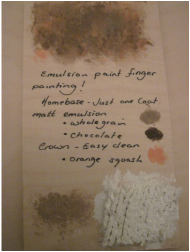
I started with the colour. I thought about using acrylic paints but decided emulsion would be cheaper and I knew this type of paint was suitable for the pupils at Step by Step school who may lick the activity board. I bought sample pots of emulsion paint in muted colours. I tried these on a piece of scrap ply and liked the muted effect. It is always a good idea to try the finish on a piece of scrap or in a hidden place on the product.
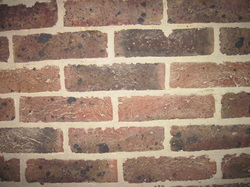
I probably should have done this earlier but it was only now that I took a closer look at my garden wall and house bricks. I wanted to clarify in my mind just what bricks and brick walls really looked like. I knew it would be important not to have bricks that looked too identical or regimented if the effect was to be realistic.I knew I needed to mix the colours but when I took a close look at my house I had never noticed just how much the brick sizes varied in size. The bricks used to build the original house were very varied in size compared to the more modern uniform bricks used to build the newer extension. With the colour and shapes sorted I turned my attention to texture.
Could I think of anything that I could use to create a texture so that the pretend brick wall would also feel realistic? I had left this part of my design to the last minute and now it seemed really important. I wished I had planned for this earlier in my project. Whatever I used would need to be safe, hard wearing and resilient . I looked at some samples I had created whilst on an art course experimenting with recycled materials, plaster and Modrock. I liked the look and feel of knitted textiles buried in plaster but I was concerned that if I used plaster over such a large area any flex in the ply may cause the plaster to split and crumble. My second choice was Modrock which actually felt very similar to bricks.
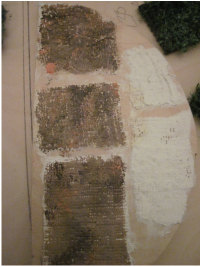
I marked out the bricks using a narrow masking tape which would protect the ply and could be used as mortar lines later on. It was hard to divide the area around the posting pipe. It was really hard to trust that imperfections in uniformity would make for a realistic finish. I had not planned for all the difficulties I would encounter using Modrock ! Firstly my brick size Modrock rectangles shrunk when they were wet. To make up for this I covered the edges in Gesso, an acrylic primer used by artists. I did not consider how the emulsion would take so differently to Modrock and Gesso . I was left with a pale line around the bricks which to my eye looked horrible. I covered this by stippling darker emulsion over the pale areas to increase the depth of colour and break up the light area. It worked! But my problems were not over yet.
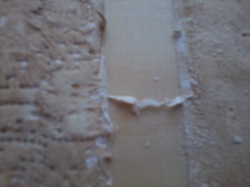
When I removed the masking tape areas of white Modrock were exposed and tiny threads that I felt the pupils might pick at were exposed. I needed to cut the threads and touch up the paint work. Finally I needed to consider how to seal the ply and emulsion covered Modrock. using my earlier experiments I covered one sample with watered down PVA glue and another with water based acrylic varnish.After a consultation with my client I used the varnish but only over the bare wood. Any finish over the Modrock lost the texture. It was decided the pupils would benefit more from the tactile experience at the cost of protecting the paint work.
To be honest I had not allowed for the many hours the finishing took. This is really something I will be very mindful of in the future.Also if If I had made a bigger test piece the size of a brick the problems would have shown up a lot sooner. I learned so much from this project not only about the materials but also about the experimenting and planning. In the end I was very pleased with the results.
Final skills ratings *****
Although I did not credit myself with a lot of knowledge at the start of the course i think that was more to do with wanting to know if I needed to know more. well one always needs to know more but I should not let that put me of saying actually I know quite a lot already. My knowledge of meal finishes is as good as my knowledge of metal and acrylic finishes.
