R5 Marking out techniques
Initial skills rating **
September 2011
I rather hope my marking out techniques are good. I have a good knowledge of marking out tools and techniques used for metal, wood, acrylic and glass. I also know about avoiding accumulative errors and the use of datum points.
Tuesday 11th November 2011 ***
Today’s tutorial with Dean.
The only new marking out technique I learned today was for marking metal. When scribing markings onto metal you can gain greater accuracy by using > and drawing lines through the points then if you were trying to scribe little lines which tend to go wobbly due to the hard nature of metal.
The lesson did however give me ample opportunity to consider how the lesson was being broken down into the basic principles and observe the way Dean was teaching. Dean asks us questions to engage our brains and check our knowledge so that the lesson can be pitched at the correct level.
It is one skill to learn to do things so automatically that you forget all the steps you learned to get there. It is another thing to remember those steps and pass them on to other people.
So if I know the techniques, what comes next? What will make that confidence grow?
Practise the techniques myself especially when it comes to using a true edge on wood. Also thinking about what I would say to someone if I have to describe what I am doing. Start observing all the things that come naturally.
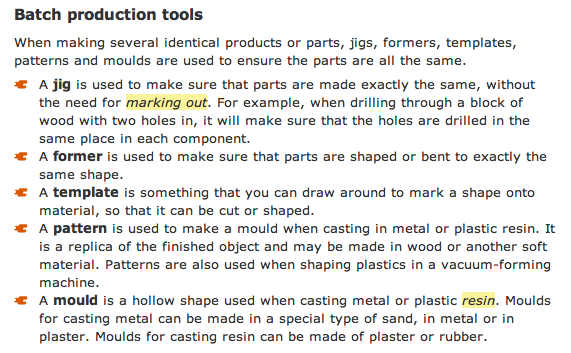
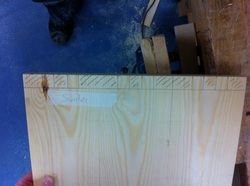
To make a bedside cabinet from solid wood I first needed to join some planks. To obtain good joins I squared each plank along the longitudinal edge at right angles to a flat reference face using the overhand planner. and labelled them using the appropriate standard markings. Before squaring I cut my planks into more manageable lengths for the overhand planer. Because I wanted to keep the grain flowing around my cabinet it was important to label each piece so that I could match them up again for example A1, B1 etc. And remove the same amount of material from each face. I felt quite mentally challenged at this point.
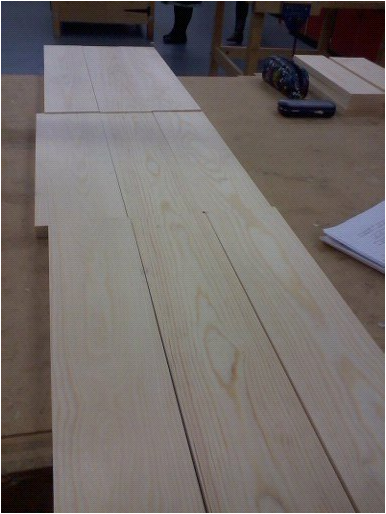
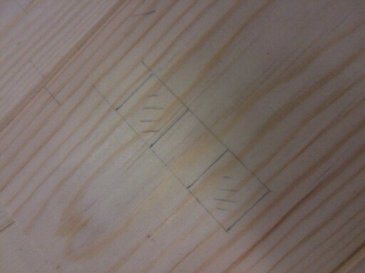
Marking out for biscuit joints
Again using the reference face to work from I spaced biscuit joints evenly Iavoiding the ends where I was likely to be shaping. By marking across two planks I could ensure my joins were going to match.
Again using the reference face to work on, I spaced the biscuit joints along the joins in my wood. Placing one biscuit in the middle i placed further biscuits evenly along the length of each plank bringing them in at the ends where I was more likely to cut into them likely to be shaping. By marking across two planks I could ensure my joins were going to match.
Again using the reference face to work on, I spaced the biscuit joints along the joins in my wood. Placing one biscuit in the middle i placed further biscuits evenly along the length of each plank bringing them in at the ends where I was more likely to cut into them likely to be shaping. By marking across two planks I could ensure my joins were going to match.
Using a try square and pencil I transferred the marking from the true face to the square edge. With the depth of the biscuit jointer set to half the thickness of the wood, I will get joints that line up providing I always work from the true face. The only other setting that I had to worry about was setting the depth of cut specific to the size of biscuit being used.
Marking out for mortise holes
When it came to marking out the mortise holes I used the centre of each plank and measured from left to right. I wanted to avoid working from one edge as I feared accumulative error would leave my last pair of mortise holes off centre.
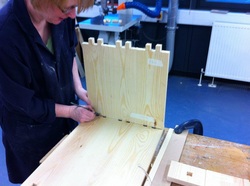
Having cut the mortise holes I transferred the markings from the holes to the edge of the wood where I was going to cut the Tenon joints.
Again taking a try square and pencil and using the true face I extended the markings to clearly show the Tenon joints to be cut.
The accuracy of my work paid off and to my absolute amazement with a little bit of tweaking, all twenty four mortise and Tenon joints lined up quite well for a first attempt.
12th February 2012 ****
By acknowledging my previous experiance and adding the knowledge I have gained working with wood I feel I have a good understanding of marking out and would now feel confident sharing that knowledge. Time to up my star rating.
22nd February 2012 *****
Finger joints - Dividing a difficult measurement evenly
I have often wondered how you divide wood up to get nice even joints. I know that working in wood is not as accurate as working in metal but even so you want your work to look good. Today I found out how to divide measurements that are not easily divisible mathematically into equal divisions by using geometry.
26th March 2012
Marking out holes in the posting tube
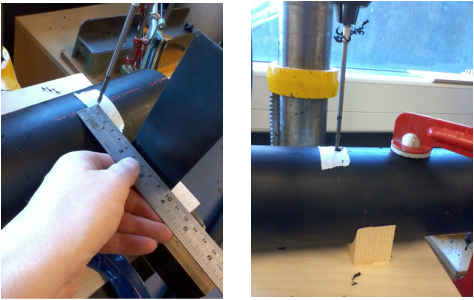
There was no easy way of marking out the holes in the polyethylene tube for my design innovation project. Marker pens do not show up on the black surface. I got over this by placing a small piece of masking tape roughly where I expected my markings to be. That way I was able to use pencil to make my marks, I could have used pen just as easily. Masking tape also helps to prevent the drill bit from skidding over the surface of any slippery face such as ceramics or acrylic. For wood one would use a bradle to help centre the drill bit and in metal one would use a centre punch but if you tried to do this with acrylic or glass the sheet would shatter.
My next problem came because I wanted posting holes in line down a one meter length of pipe. I wanted these holes to be central and I wanted fixing holes to be concentric but in the rear of the pipe. There was a danger that even if I marked the hole correctly if the pipe was not set up perfectly I could still cut the holes to one side. I had to ensure that not only was my pipe marked out with all the holes running in line longitudinally but also when I came to drill them the point marked had to be the very upper part of the tube.
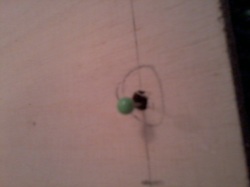
It was lucky that there was some writing and lines running the length of the tube. I was able to utilise these as my longitudinal marking out line. I used masking tape as mentioned earlier to mark the centre of the holes. I created a jig to stabilise the pipe whilst drilling. I checked that the drill was going to enter the pipe at the uppermost point and centrally by placing a try square up against the edge of the pipe and measuring the radius across to the marked hole. Using a long drill bit I was able to make a small pilot hole that passed through the whole of the pipe.
My next problem came because I wanted posting holes in line down a one meter length of pipe. I wanted these holes to be central and I wanted fixing holes to be concentric but in the rear of the pipe. There was a danger that even if I marked the hole correctly if the pipe was not set up perfectly I could still cut the holes to one side. I had to ensure that not only was my pipe marked out with all the holes running in line longitudinally but also when I came to drill them the point marked had to be the very upper part of the tube.
It was lucky that there was some writing and lines running the length of the tube. I was able to utilise these as my longitudinal marking out line. I used masking tape as mentioned earlier to mark the centre of the holes. I created a jig to stabilise the pipe whilst drilling. I checked that the drill was going to enter the pipe at the uppermost point and centrally by placing a try square up against the edge of the pipe and measuring the radius across to the marked hole. Using a long drill bit I was able to make a small pilot hole that passed through the whole of the pipe.
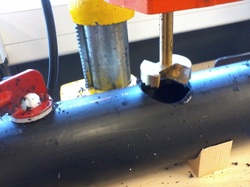
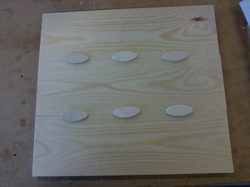
I opened out the hole using a forstner bit at the front before opening out the smaller holes at the back with a larger drill bit.
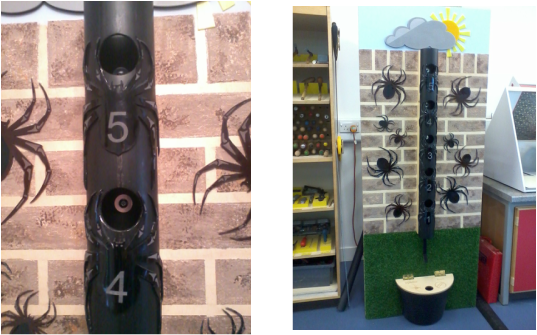
The results appeared to be good enough when viewed assembled.
The results appeared to be good enough when viewed assembled.
18th May 2012
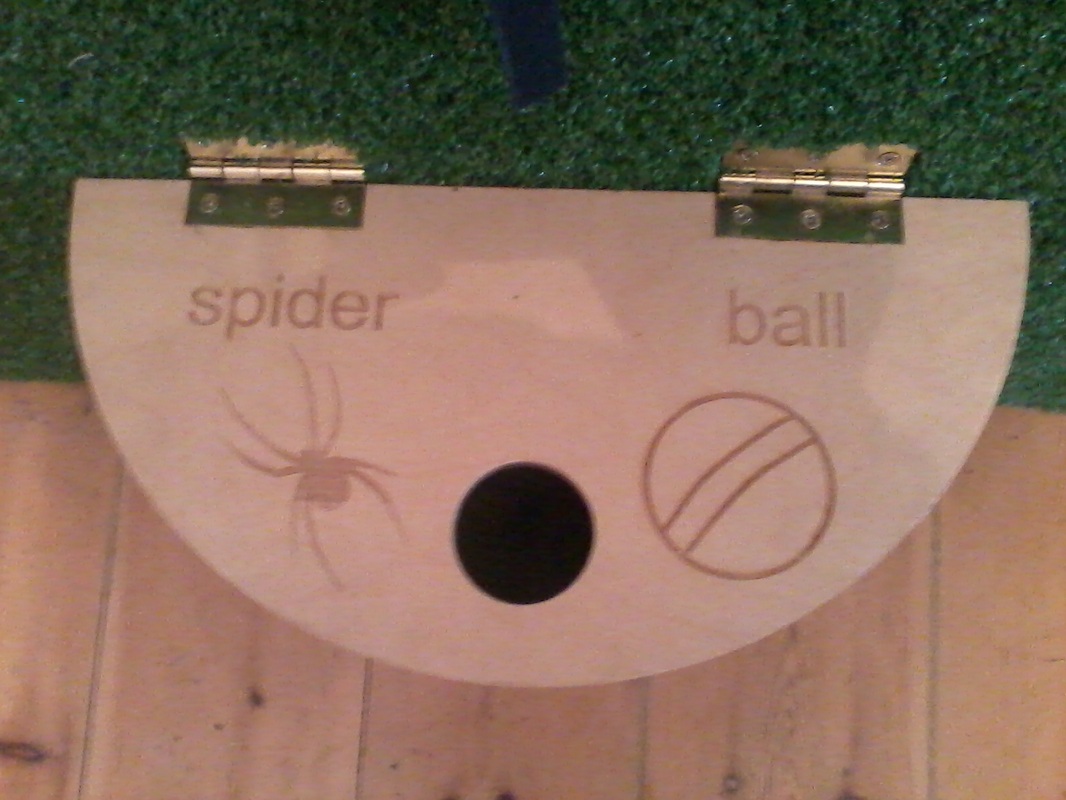
Marking out using the laser cutter
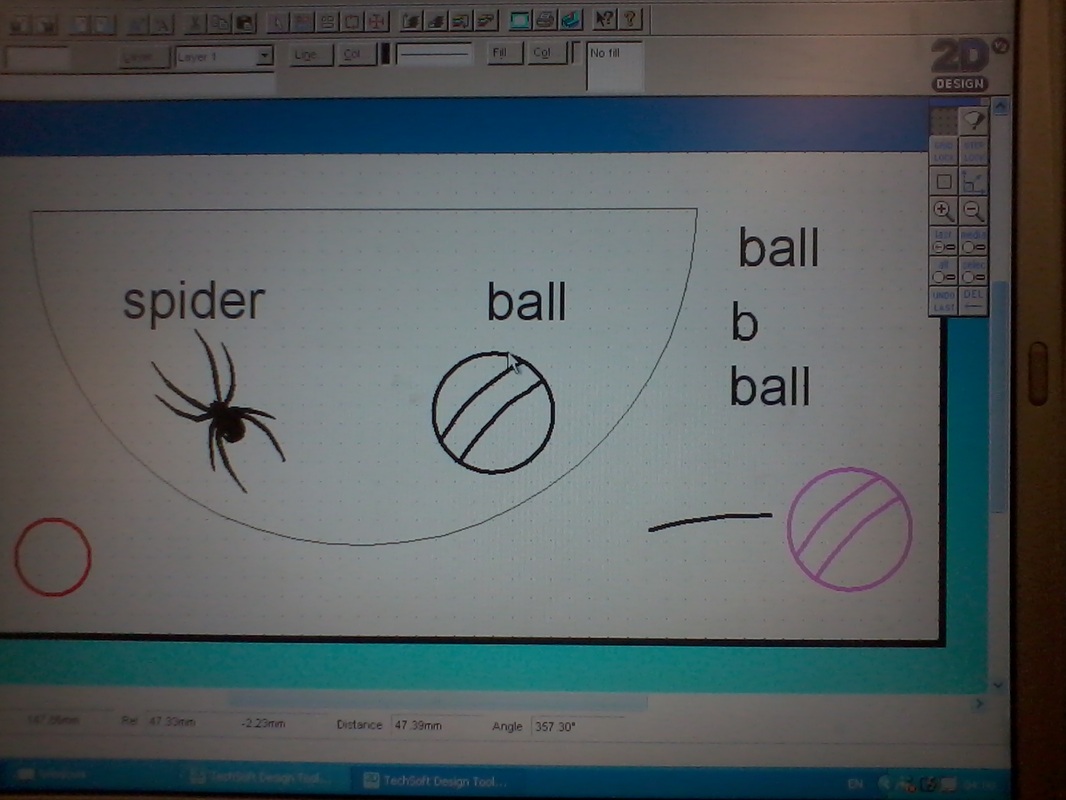

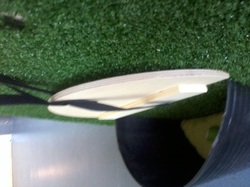
Marking out a large semi-circle is not the easiest thing to do especially when you do not have a large compass and extension bar to hand. I thought about using string, a pencil with a pin as the central pivot but I knew this would not be very easy do do and would not be very accurate either. Then it occurred to me that I could use the laser cutter. After all I needed to create a drawing of the lid so that I could position the engraving in relation to the edges of the material and the posting hole. Rather than just engraving the words and pictures I also engraved the outside profile of the lid. this gave me something to work to.
I was then able to roughly cut the lid out using the band saw by cutting on the waste side of the engraved line. Using the belt sander I removed teh remaining waste material and made a fairly accurate semi circular lid.
I was then able to roughly cut the lid out using the band saw by cutting on the waste side of the engraved line. Using the belt sander I removed teh remaining waste material and made a fairly accurate semi circular lid.
Covering the lower section of the activity board with artificial grass also presented me with marking out problems. I wanted to make the grass board separate from the main frame so that I could tuck the edges of the grass neatly out of sight. A smaller board would be easier to manage and if it was to get damaged it would be easy to replace a section. Although I thought of screwing the grass section to the main frame was the most sensible option I decided I would not like to see the fixings over the grass. I needed to cover the small board with grass before I screwed it into place. I thought about those little plastic caps you get as screw covers and wondered if I could do the same with artificial grass. I pre drilled the fixing holes in the small board but transferring measurements to the back of the grass seemed too difficult. I did not have a white marker pen to hand. It was late but I really needed to get the job done using anything I could find around the house. Reaching for glass headed pins I pushed them through the pre-drilled holes.
19th May 2012
Artificial grass
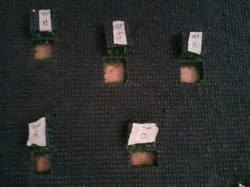
Lifting the wood over the head of the pins I was able to start cutting squares out of the grass. Because of the weave the little squares started to vary in size and shape. I knew if I wanted the grass to look good the right little squares would each have to go back to their original position but with out labelling I would struggle to match them again.
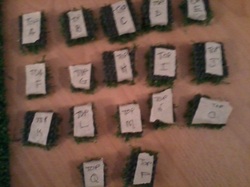
Every little grass shape was given its own identifying letter stuck on with masking tape.
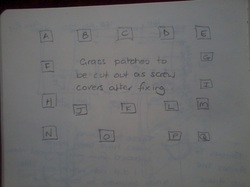
I kept a sketch of the holes and letters. Once the grass was stuck into place and the board screwed to the main frame I was able to stick my little screw covers in the right hole. I amazed myself with my organisation and it paid off.
And I cannot even see the joins!
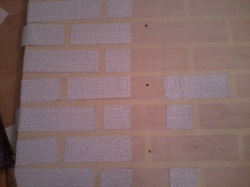
Although the bricks followed basic measurements I did not want rigid straight lines. I used masking tape to go from marked point to marked point. Filling the rectangles with Modrock the masking tape acted as a screen for paint.
24th May 2012
Hidden markings
There are times when the markings are just hidden due to the manufacturing techniques used.
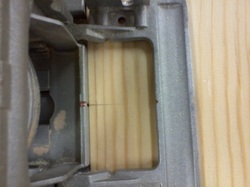
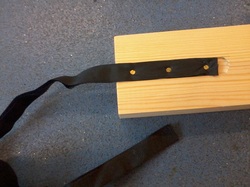
I wanted to hide the ends of the Velcro used to hold the lid up on my design innovation project behind the posting pipe support bracket. I knew exactly how long, deep and wide I wanted the groove to be. I thought the best method to achieve this was by using the router set up like a spindle cutter.
I wanted to hide the ends of the Velcro used to hold the lid up on my design innovation project behind the posting pipe support bracket. I knew exactly how long, deep and wide I wanted the groove to be. I thought the best method to achieve this was by using the router set up like a spindle cutter.

I could set the depth of cut by the amount the cutter protruded from the machine bed. I could set the width positioning from the fence. But the way to consistently cut to the same length was to mark the machine fence itself. By placing a small amount of masking tape I could move my wood over the router bit and stop when it reached the masking tape. When the fence was moved backwards to increase the width of the groove I repeated the cut again to the masking tape. The result was a grove cut to the same length on each pass of the router.
Reflection
There were many times whist making the activity board that standard methods and tools for marking out were not suitable. This meant I had to look for more original methods which at times was challenging. I was particularly pleased with the idea of using the laser cutter as this was very quick and accurate and utilised a drawing I had already made. The method used for the artificial grass was inventive but with the right tools, more time and energy I think I could have used more traditional methods. It is not unusual to put small markers on the machines but it is important to only use a temporary method of marking.
Important point
Probable the most important thing to consider when marking out is are the marking out lines going to be visible after the cutting out has been done and if the answer is yes use one of the non permanent methods of marking such as pens and pencils. Where the marking out is going to be removed or hidden then permanent methods such as scriber, centre punch and making gauges can be used.
I was also pleased with the marking out of the posting tube. I thought it was going to be very hard to mark out the holes and drill them in line until I realised that with the application of a little geometry I could do a reasonable job with the tools to hand. Of course if this was being mass produced the use of a jig would make light work of the task.
Jigs can be used to reduce the need for marking out individual items that are to be the same. Templates are used to draw around and can be used several times.
A useful little bit from BBC Bitesize